问题描述#
国产信创服务器KunPeng920芯片部署Proxmox VE:
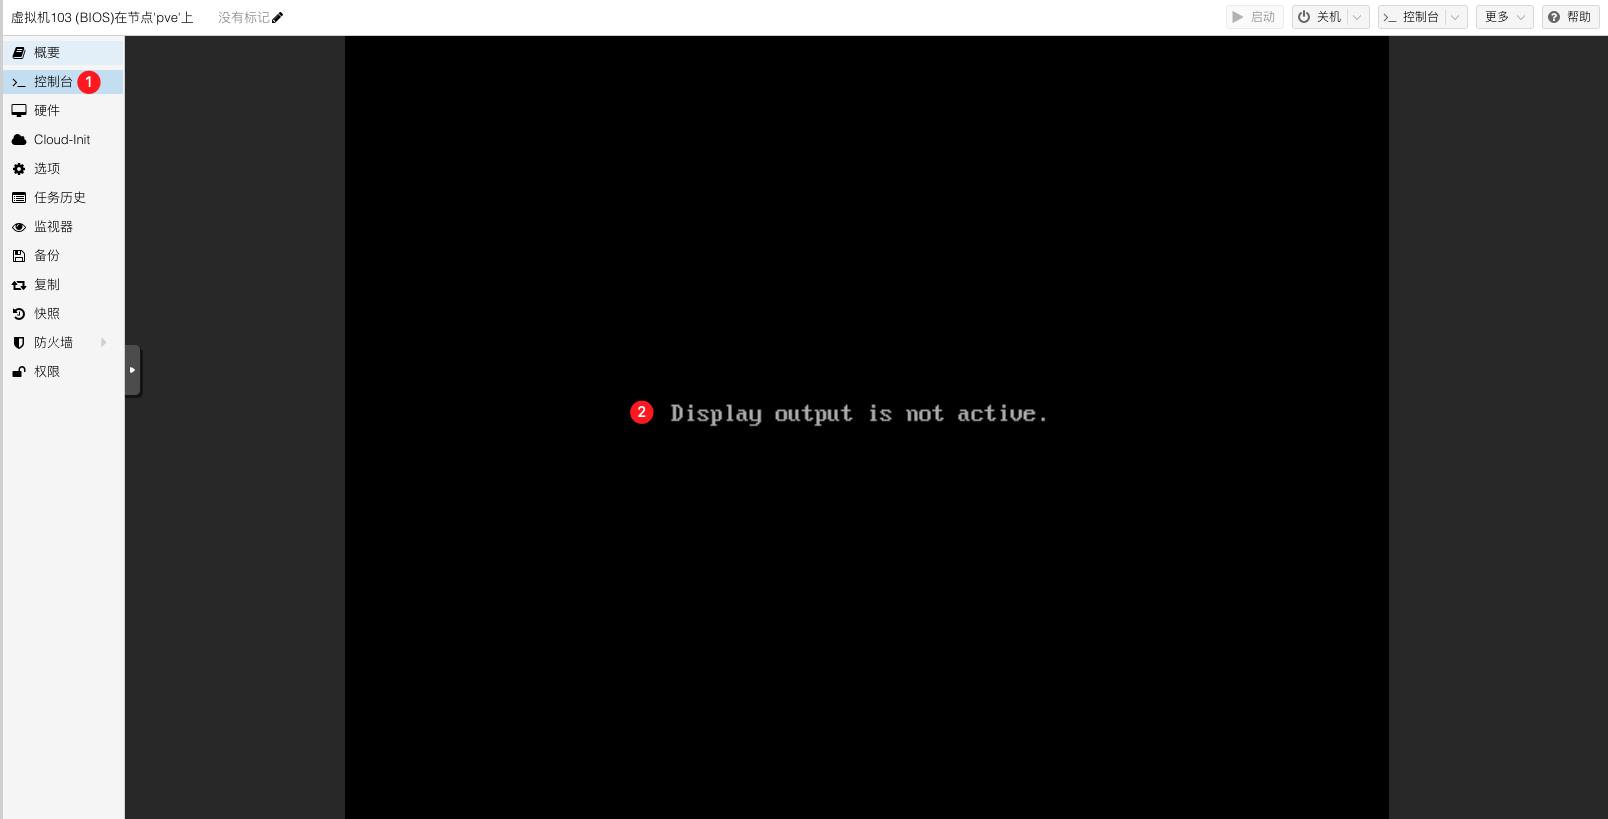
- 创建虚拟机,打开电源;控制台显示
Display output is not active;未正常进入系统安装页面
环境信息#
创建虚拟机并使用默认配置:
- CPU: aarch64
- BIOS: SeaBIOS
- SCSI控制器: VirtIO SCSI
- 网络设备: virtio
分析故障#
- 怀疑BIOS导致开机不正常,切换为
UEFI引导方式
问题处理#
- 查看是否存在
UEFI firmware
# AAVMF_CODE.ms.fd
ls -l /usr/share/pve-edk2-firmware
- 安装
UEFI firmware
# 更新APT
apt update
# 安装pve-edk2-firmware-aarch64
apt install pve-edk2-firmware-aarch64
- 查看是否安装成功

Virtual Machines
The pve-edk2-firmware package, which provides (U)EFI firmware for virtual machines, has been split up in multiple packages. Users of the fully supported amd64/x86_64 architectures do not need to change anything.
The OVMF variants, used for amd64/x86_64 based virtual machines, got moved into pve-edk2-firmware-ovmf and pve-edk2-firmware-legacy, these will always be installed automatically on upgrade.
The AAVMF variants, used for the experimental ARM64 VM integration, have been moved to pve-edk2-firmware-aarch64, this package won’t be automatically installed on upgrade, if you rely on the experimental ARM integration you need to manually install this package.
With the 8.1 machine version, QEMU switched to using SMBIOS 3.0 by default, utilizing a 64-bit entry point. Since the SMBIOS 32-bit and 64-bit entry points can coexist, and most modern operating systems set up both, the general impact should be minimal
However, certain operating systems or appliances, such as Juniper’s vSRX, do not have a 64-bit entry point set up and might fail to boot with the new machine type.
For affected VMs, you can explicitly pin the machine version to 8.0 in the web interface. Note that the machine version of VMs with a Windows OS type is automatically pinned to the most recent version at the time of creation.
- 创建虚拟机,BIOS配置如下
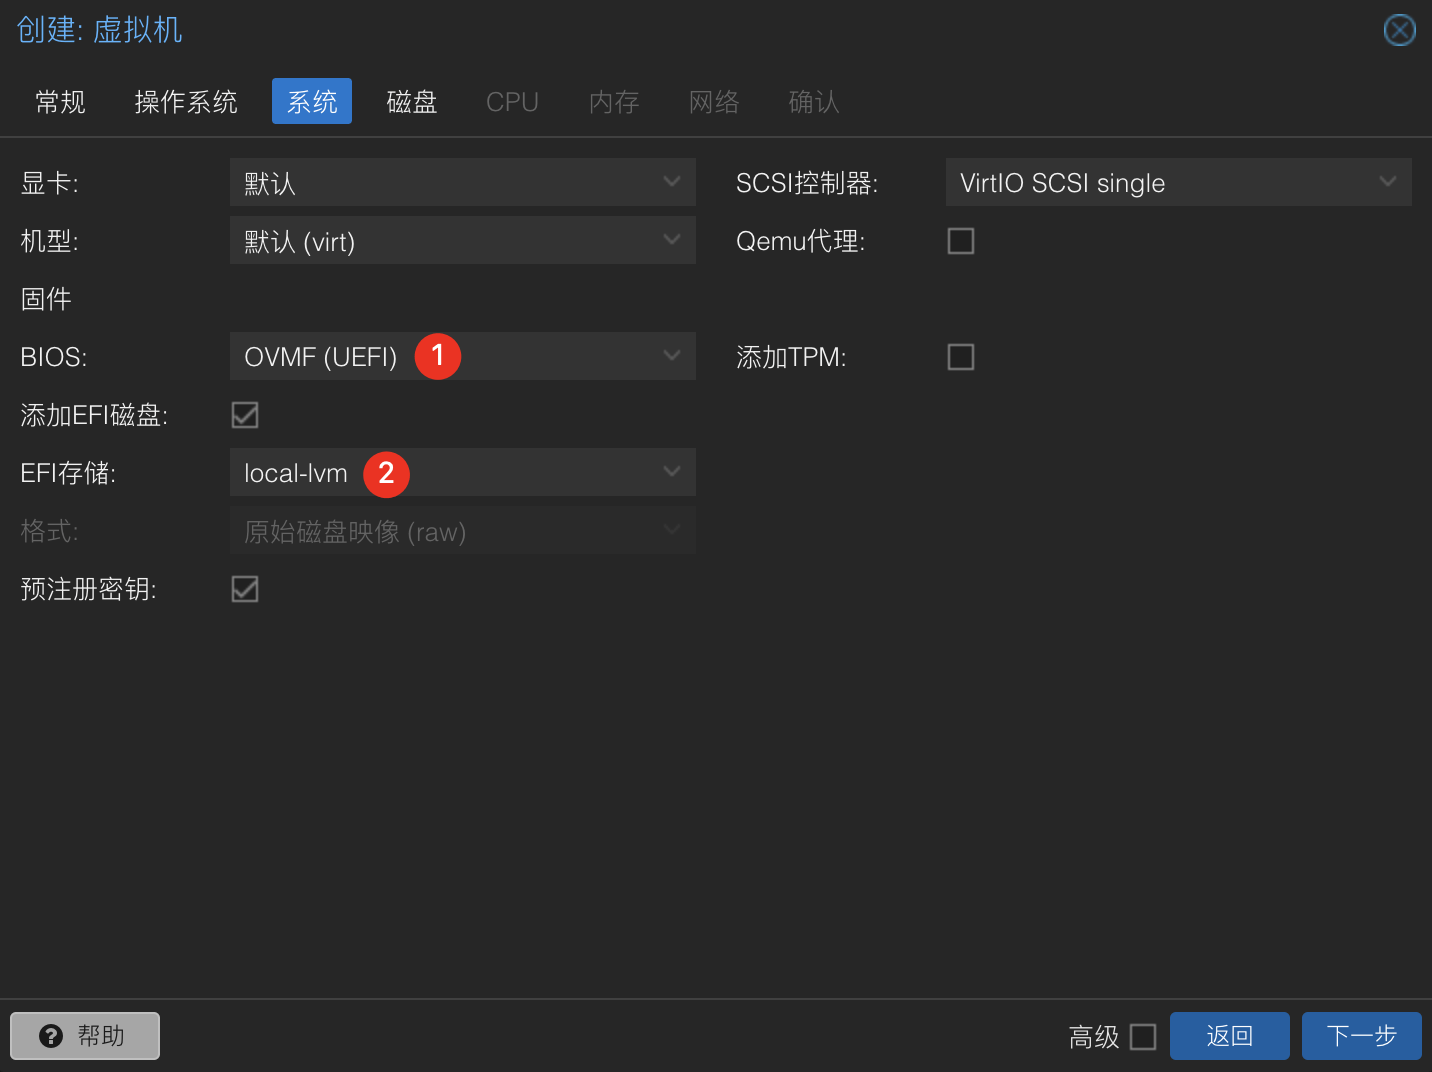
- 打开虚拟机电源,正常进入系统引导
参考: